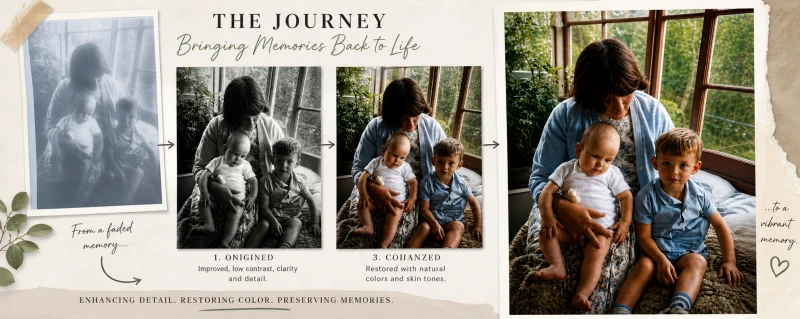
(Step-by-Step Guide You Can Follow)
Pull up a chair… let’s do this properly. You don’t need to be technical. You don’t need expensive software.
You just need a decent photo… and a bit of guidance.
⚡ Quick Start (Do This First)
- Take a clear photo of your original
- Upload it into ChatGPT
- Run the enhancement prompt
- Then colourise it
- Create a before/after image
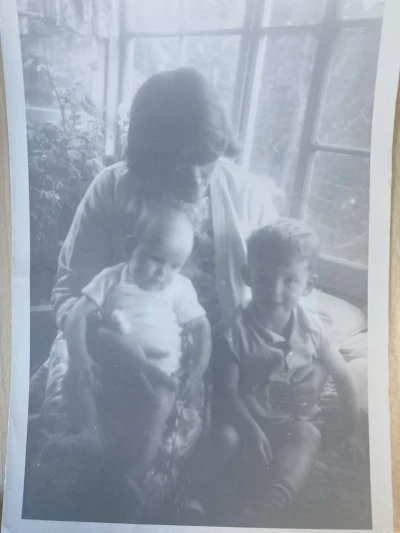
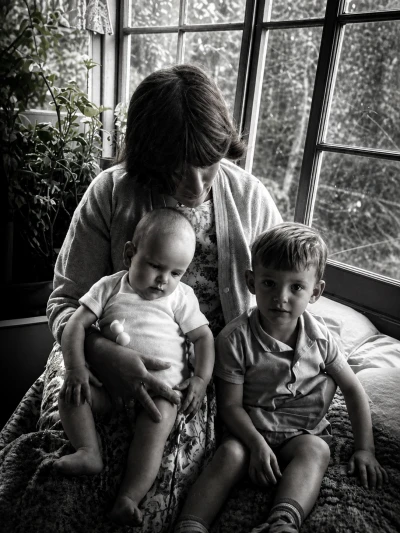
Step 1: Capture the Original Photo Properly
Before we even touch AI… this matters more than you think.
What to do:
- Place the photo on a flat surface
- Use natural light (near a window is perfect)
- Avoid glare (angle slightly if needed)
- Take the photo straight-on (not tilted)
Tip:
If you can scan it… even better.
But a phone photo works perfectly fine.
Step 2: Upload the Image into ChatGPT (or your AI tool)
This is where the magic starts.
Upload your image and start simple.
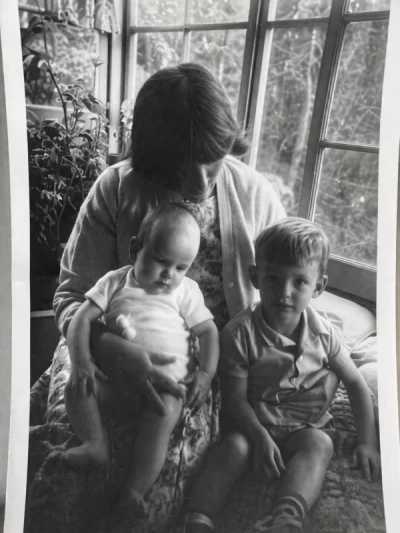
Step 3: First Prompt – Clean It Up
You don’t jump straight to colour…
Please enhance this old photo.
Improve clarity, contrast, and sharpness while keeping it natural.
Remove any fading, noise, or damage if possible.
👉 What this does:
- Brings back detail
- Fixes washed-out tones
- Makes faces clearer
Step 4: Remove Borders (If Needed)
If your photo has white edges like yours did:
Prompt:
Please crop the image to remove any white borders or edges
and keep the original composition intact.
👉 Clean image = better final result
Step 5: Second Enhancement Pass (Optional but Powerful)
Now we refine it further.
Prompt:
Further enhance this image by sharpening facial features,
balancing lighting, and improving overall detail while keeping it realistic.
👉 This step is where it really starts to “pop”
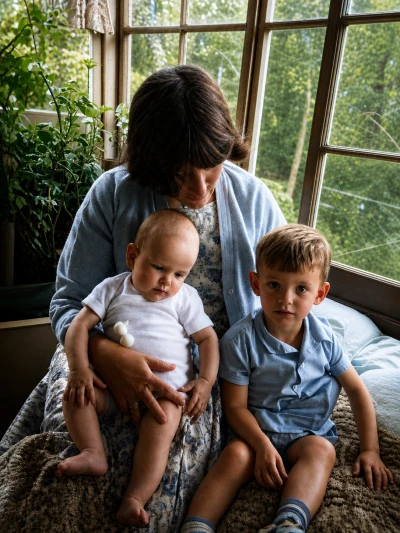
Step 6: Colourise the Image
Now the fun part…
Prompt:
Please colourise this photo realistically.
Use natural skin tones, soft lighting, and accurate colours.
Keep it subtle and true to life, not overly saturated.
👉 Key tip:
Always say realistic and not overly saturated
Otherwise AI can go a bit wild 😄
Step 7: Fine-Tune the Result (Optional)
If something looks off, tweak it.
Example prompts:
Adjust the colours to be slightly warmer and more natural. Reduce saturation slightly and keep a vintage feel. Improve skin tones so they look more realistic.
Quick Summary (Cheat Sheet)
- Take a good photo of the original
- Upload to ChatGPT
- Enhance clarity and detail
- Remove borders
- Refine the image
- Colourise naturally
- Adjust if needed
- Share it
Just for fun – I animated it.
Now there are many tools that can do this but one I like to use is called Kling.
I am an avid Website developer and Affiliate Marketer.
I created my First Website back in 2001 using Frontpage (yes that old…) which quickly led me into Hand coding HTML and CSS.
So over time I got a bit handy with custom PHP scripts and MySQL Database Design and not forgetting javascript.
So, If you ever have any questions – except for “what are the winning lotto numbers” I will do my best to help when I can.